


Deploy a mapping group ID to users through Microsoft Intune
Use this method to deploy a mapping group ID to managed cloud devices. Before you begin, please download the PowerShell script template from the Downloads page in Iris. We have provided you with this template so you can use it to add a mapping group ID to the Registry. Once downloaded, you will notice that the following file is available in the C:\Users\UserName\Downloads folder: Powershell_script_template.zip.
-
Extract the contents of the Powershell_script_template.zip folder.
-
Open the Mapping group key folder followed by the PowerShell script in a Text Editor such as Notepad or Notepad++.
-
Replace the INSERT_YOUR_MAPPINGGROUP_KEY_VALUE string with the ID of the mapping group you’re deploying within the quotation marks and save the PowerShell script.
You can copy the ID for the mapping group you want to deploy from the Custom mapping groups tab on the Mappings page in Iris. ![]()

-
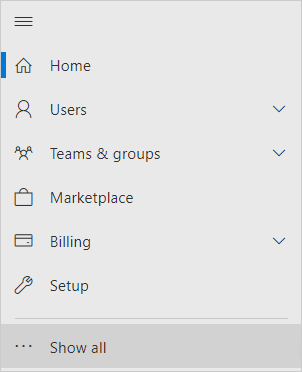
Log in to the Microsoft 365 admin center and select Show all from the Navigation menu.

-
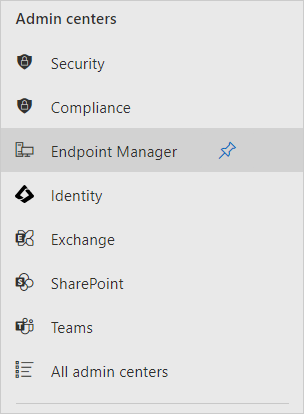
Select Microsoft Intune to open the Microsoft Intune admin center.
-
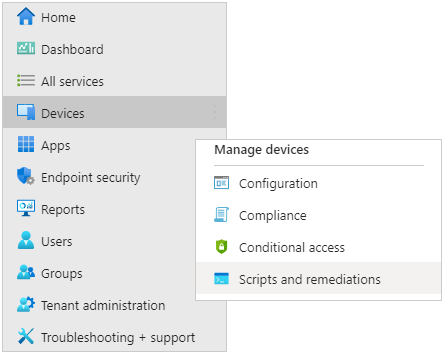
Select Devices from the Navigation menu, then Scripts and remediations on the Devices | Overview page.
-
Select the Platform scripts tab from the Devices | Scripts and remediations page, then Add > Windows 10 and later. The Add PowerShell script page appears.
-
In the Basics section, type the name of the PowerShell script in the Name box, then select Next.
-
In the Script settings section, click the Select a file icon to select the PowerShell script you edited earlier.

The PowerShell script will add the ID of the mapping group you’re deploying to the Registry.
-
Select Yes to run the PowerShell script using the logged on credentials.
-
Leave all other settings as default and select Next.
-
In the Assignments section, select Add groups (under Included groups) to display the Select groups to include blade.

-
Select the desired Microsoft Entra ID groups to which you want to deploy the mapping group ID, then click Select.
-
Leave all other settings as default and select Next.
-
Review the settings summary in the Review + create section and select Create to complete deploying the mapping group ID to users through Microsoft Intune.
When you deploy a mapping group ID through Microsoft Intune, your changes will not take effect immediately. Devices in the selected Microsoft Entra ID groups will sync automatically over a period (generally 30 minutes); you can also manually sync all the devices in the chosen groups via Bulk Device Actions or restart your computer to implement your changes immediately. If you’re deploying a mapping group ID through Microsoft Intune to a device where CDM is already running, you must restart CDM on that device for your changes to take effect.
